This WordPress Gutenberg Tutorial will teach you all the in’s and out’s of WordPress’ new and improved editor. WordPress is one of the most popular website builders and recently made a major update by rolling out the new WordPress Gutenberg editor.
This update will affect just about every WordPress user from websites that run their publications, e-commerce sites, blogs, business sites and much more! We’ve made it easy for you to get up and running with the new WordPress editor with these 10 simple steps. You’ll be creating and sharing beautiful content for your website in no time!

Regardless of what type of website you are running through WordPress, you most likely will be affected by the new Gutenberg WordPress editor. This latest change has made it easy for anyone to create amazing website content. As soon as you update to WordPress 5.0, you’re going to find the Gutenberg editor as your default page editor.
At first glance, the new Gutenberg editor will feel different and unfamiliar. Don’t fret! By the end of this WordPress Gutenberg tutorial, you’re going to be ready to make awesome webpages and content in no time. So let’s jump in!
What is Gutenberg?
Gutenberg was the code name used by WordPress to identify their new block editing experience in WordPress. Gutenberg may be a fully redesigned editor aimed toward replacing the original TinyMCE editor that WordPress has used for, well…pretty much forever.
The editing canvas has changed from a single huge text area where you can add images and shortcodes to be an entirely new interface full of widget blocks that you can place together to build beautiful and awesome designs on your blog posts or landing pages.
Gutenberg’s goal is to make it easy and a lot more accessible for casual users to make distinctive content structures by utilizing blocks. But aside from the new interface styling, the real change that Gutenberg will bring is in that block-based editing approach.
Related: Key features of WordPress Gutenberg Editor and How it is different from Classic Editor
How Does The WordPress Gutenberg Editor Work?
If you’re using WordPress, I’m sure you’re familiar with how the old classic editor works – you have a single layout where you write your text, add your images, embed videos, etc.
Gutenberg changes that by allowing you to write your posts using multiple ‘blocks‘.
A ‘block’ can be pretty much anything. For example, these count as a block:
- Paragraph of text
- Image
- Embedded video
- Quote
- Button

How to install Gutenberg?
Before we begin the WordPress Gutenberg Tutorial, we need to first install Gutenberg.
Gutenberg can be downloaded from the WordPress repository or by going to your WordPress dashboard below “Add New” plugins. We recommend installing this first on a test site.
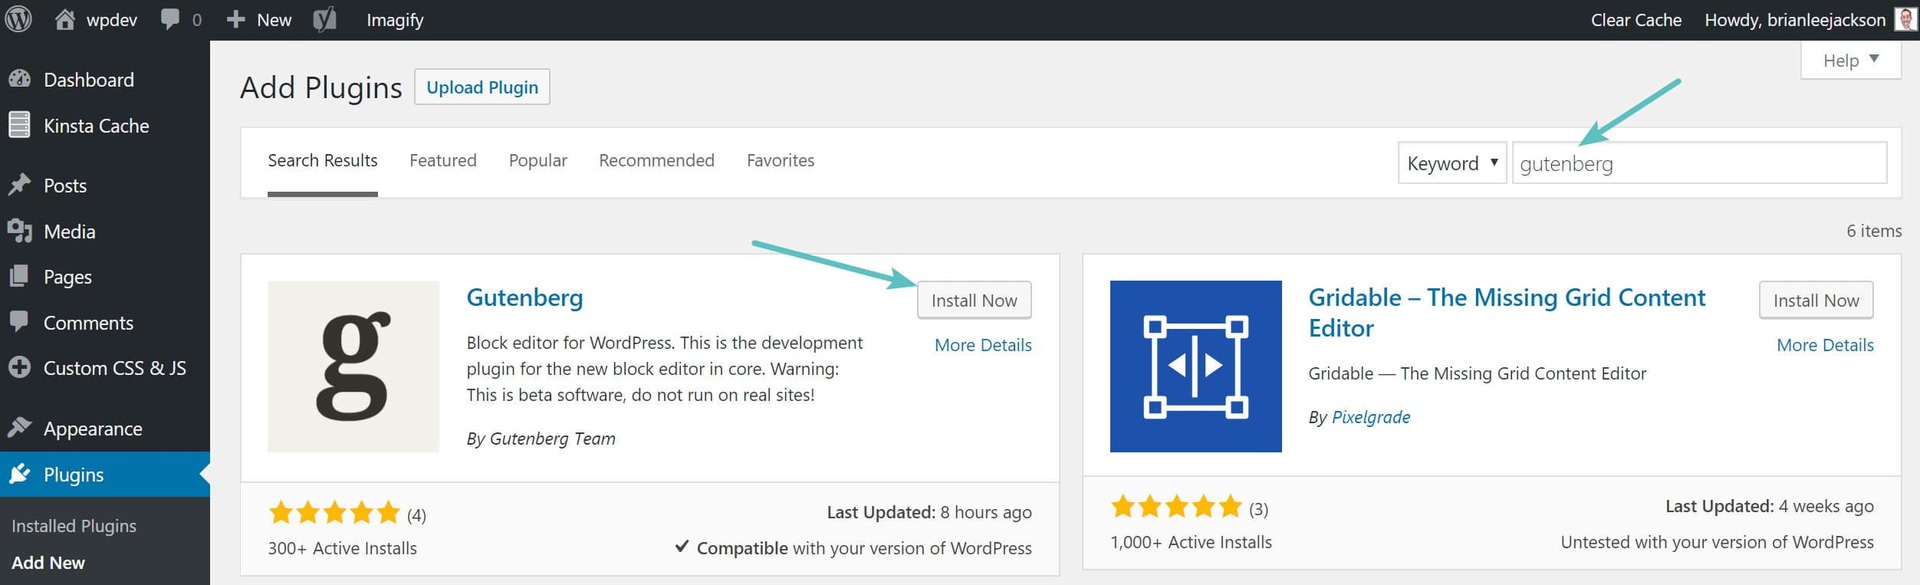
Follow these simple steps to install Gutenberg’s WordPress editor plugin:
- Go to “Plugins > Add New”.
- Search for “Gutenberg”.
- Install and activate the Gutenberg plugin.
- You’ll have a “Gutenberg” menu located at your bottom left-side toolbar.
Note: After the WordPress 5.0 update, Gutenberg will be the default WordPress Editor.
Things We Will Cover in this WordPress Gutenberg Tutorial:
This WordPress Gutenberg Tutorial is divided into the following 10 easy steps to help you start creating awesome content quickly.
- The New WordPress block editor
- Creating a New Blog Post and Page
- The Interface
- How to Add New Blocks in Gutenberg
- Working with Blocks to Add Content
- Saving and Reusing Blocks in Gutenberg
- Removing a Block
- Adding Content Using Embeds
- Adding Buttons and Columns
- Exploring Gutenberg Block Settings
1. Using Gutenberg – The New WordPress Block Editor
The block editor is meant to be intuitive and versatile.
While it looks different than the old WordPress editor, it still does all the things that you were able to do in the classic editor.
Let’s begin with covering the essential things that you might have done in the classical editor, and move on towards Gutenberg blocks
2. Creating a New Blog Post or Page Using The Block Editor
Start by creating a blog post or page like you normally do. Simply click on Posts » Add New menu in your WordPress admin. If you are creating a page, then go to Pages » Add New menu.
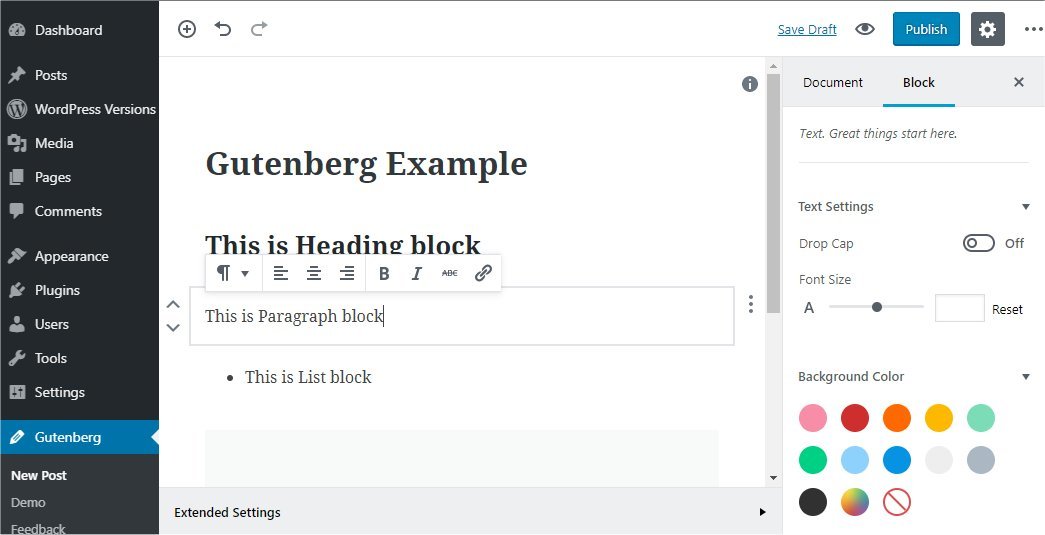
3. The Interface
Starting on the left you’ll see a plus button, this is where you will add a block. You’ll want to think of blocks as pieces of content that will make up your post. You can access this plus button anywhere on your page when you click on it.
You also have an undo and a redo button which is quite helpful to edit changes you made or redo a specific thing. Next, to that, there is an (i) button which gives you info about the number of words, paragraphs, etc. in your blocks.
Onto the right, you’ll see options to Save Draft, View Preview and Publish. You can also select the cogwheel settings button which displays common settings like document, block settings, text settings, color, and advanced settings.
Right next to it are three dots that show more settings like visual view, code view, and Gutenberg Tips. This is a great place to go when you need some additional guidance.
4. How to Add New Blocks in Gutenberg
Blocks are going to be your best friend in this WordPress Gutenberg Tutorial. You’re not going to always want to write just paragraphs of text, often you need to insert GIFs, images, videos, etc. Follow these steps to add new blocks of content.
- Go to your WordPress interface and open the page or post you want to edit.
- Click the plus button in the body of the post/page.
- Search for content like paragraph, button, image, embed, etc. to add.
- Click the content to add the specific block.
- The block will be added to the page.
5. Working with Blocks to Add Content
You can add beautiful content using blocks. One of the benefits of Gutenberg is that it is point and click.
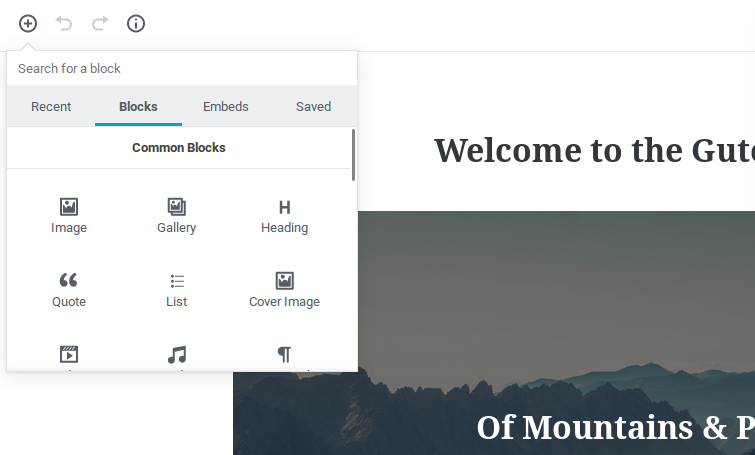
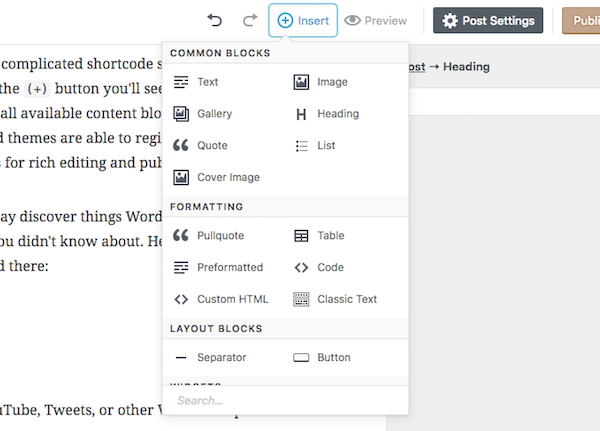
Press + button which will display various widgets such as image, paragraph, list, import from the gallery, add a cover image, add a heading, quotes, audio, etc. or search for a particular block.

There are various types of blocks that serve different purposes from:
- Formatting Blocks – including classic editor, table element, etc.
- Layout Blocks
- Widget Blocks
- Embed Blocks
While adding new blocks, you will notice three faint icons. These are your most recently used blocks, so you can click on it and quickly change the format of the blocks.
Related: How to Embed Youtube Video Collections In WordPress in Simple Steps
6. Saving and Reusing Blocks for the Future
One of the best things about blocks is that they can be saved and reused individually. This is particularly helpful for developers who frequently need to add specific stuff in their blogs or website.
- Simply click on the menu button(…) located at the right corner of each block’s toolbar. From there, select ‘Add to reusable blocks’ option.
- You will be asked to provide a name for this reusable block. Enter a name for your block which you’ll easily remember and click the save button.
- To add the reusable block simply edit the post where you want to add the reusable block and click on the add block button.
- You will find your saved block under the ‘Reusable’ tab. You can also find it by searching for it in the search bar.
7. Removing a Block
- If you want to remove the block from your page or post, simply click the three dots in the block tab and click remove the block. It’s just that easy!
8. Adding Content Using Embeds
- You can add content like YouTube videos, blog post links, Spotify audio and much more using Gutenberg blocks. Just click the plus button to open the list of blocks—-> click embeds ——–> and choose whatever platform you want to embed content from and boom you’re done!!!!!
9. Adding Buttons and Columns
- You can add buttons in your posts which are pretty handy dandy if you wanna link them to other pages. To do that, click the plus button, search for button and click on the button icon and there you go, a button is added.

- Similarly, you can add columns in your post by using the same method but instead of searching for a button, search for column and tada! You can divide that post segment into a column. Pretty sweet – right?
10. Play Around with Gutenberg Block Settings
- To get familiar with Gutenberg blocks, I recommend playing around trying the block setting such as color, size, font, etc. to design the desired page for your website. If you get stuck you can go back up and give this WordPress Gutenberg tutorial another read!
And finally, you can preview your pages to see how it would look to your audience. Once it’s perfected click publish and you’re ready to show off your awesome content to the world!
If you have any feedback on our WordPress Gutenberg Tutorial, do comment on our blog.
Cheers!!

Watch this video to learn more about how to add content using embeds👇

Further reads:
- 10 Must Have WordPress Gutenberg Plugins For Your Website
- 11 WordPress Widgets to Make Your Website Even Better!
- Chrome Extensions for WordPress That’ll Make You 10X More Productive
- Top 8 Web Hosting Service Providers in 2021
Don’t want to forget this information?
elink it for future reference!