Hold your hats because you’re about to be swept away by what we’re going to tell you:
- Instagram has over 1 billion active users. (Source)
- 72% of them make a purchasing decision after seeing something on Instagram. (Source)
- There are more than 8 million business profiles on Instagram. (Source)
- 70% of Instagram hashtags are branded. (Source)
- 65% of the world’s top 100 brands using Instagram. (Source)
Considering all these crazy stats, it’s obvious that Instagram is not just a place where you share cute dog photos or photos of you hanging out with your friends – it’s the world’s most powerful marketing tool.
In fact, saying that “Instagram is great for businesses” would be a MASSIVE understatement.
It is like the party of the century. We mean, as a business owner, would you pass up a social network with 1 billion active users? Of course, you won’t!
If your business is already on the Instagram bandwagon, you’re right on track, but why not get some added benefits from your Instagram posts, and the posts of your customers?
Why not embed these posts to your website? To be more specific, why not create an Instagram wall for your website? The content is already there, it won’t cost a cent and it’ll dramatically increase your reach!
An Instagram Wall? What the Heck is That?
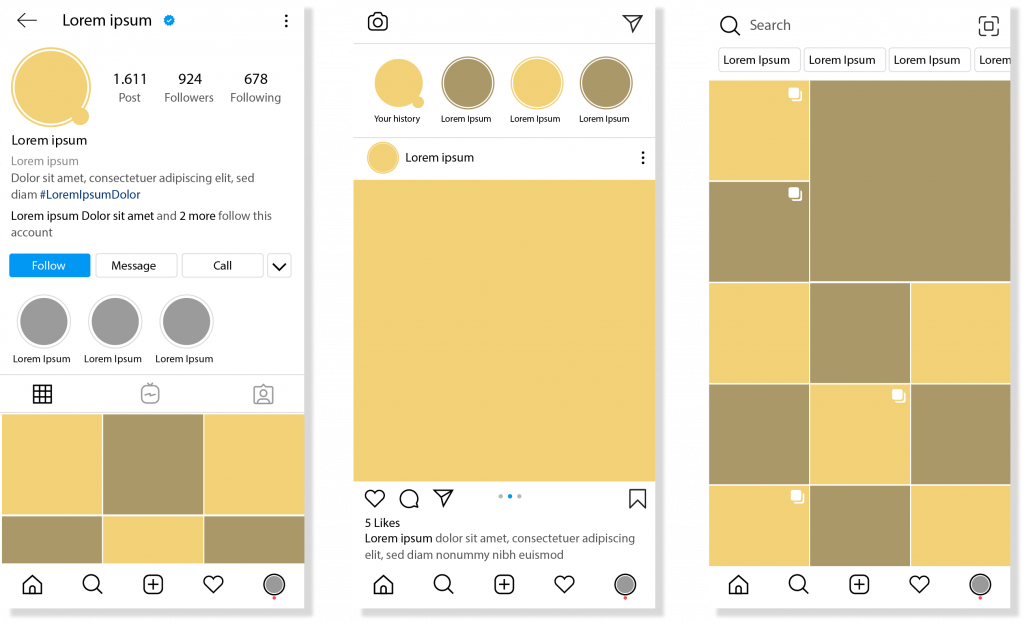
An Instagram wall is basically a feed of Instagram posts that you embed into your website. You can create an Instagram wall using your recent posts, your most loved posts, or user-generated content. It’s up to you!
When your visitors are browsing through your website, they’ll get a glimpse into your creative side from your Instagram wall, and they’ll be more inclined towards following your brand on Instagram.
The result? High engagement levels, long-lasting customer relationships, and more conversions!
Not to forget, what’s written on your website isn’t enough to convince people anymore. To make your customers’ choose your brand over others, you need to incorporate user-generated content on your website.
…and the best way to do that is by using Instagram walls! After all, people are sharing their experiences through Instagram using photos and videos more than ever before.
And, if your existing customers are already generating the content for you, why not get the most out of it? (All you need to do is ask your audience to mention your brand in their Instagram posts where they’ve used your product/service and use it on your Instagram wall.)
Creating an Instagram wall for your website certainly doesn’t sound like sunshine and rainbows, right? It sounds like a dreading, exhausting task instead.

But, there’s actually something out there that’ll make the entire process a smooth ride. Ladies and gentlemen, we present to you the most amazing tool on earth…*drumroll*….elink.io.
Read more: How to Create a Custom Social Media Wall for Your Website?
Umm…What is elink.io?

elink.io is the fastest, most efficient, and wonderful way to create newsletters, webpages, RSS website widgets, social bio links, Instagram walls, and more – without breaking a sweat.
All you’ve to do is collect links and elink will convert that collection into visual content that you can publish any way you want! elink even automates content creation for your website and newsletters.
But for now, let’s just focus on what you came for: how to create an Instagram wall for your website using elink? For that, you first need to download elink’s Chrome or Firefox Extension.
You must be wondering, “How can I create an Instagram wall for my website using just an extension?” Well, that’s because this extension is one of the most robust extensions out there.
It’s a bookmark manager that doubles up as a tool that you can use to create an Instagram wall. In short, it’s the holy grail that you’ve been looking for.
Create an Instagram Wall for your Website in 8 Easy Steps (Don’t Forget to Download the Extension First)
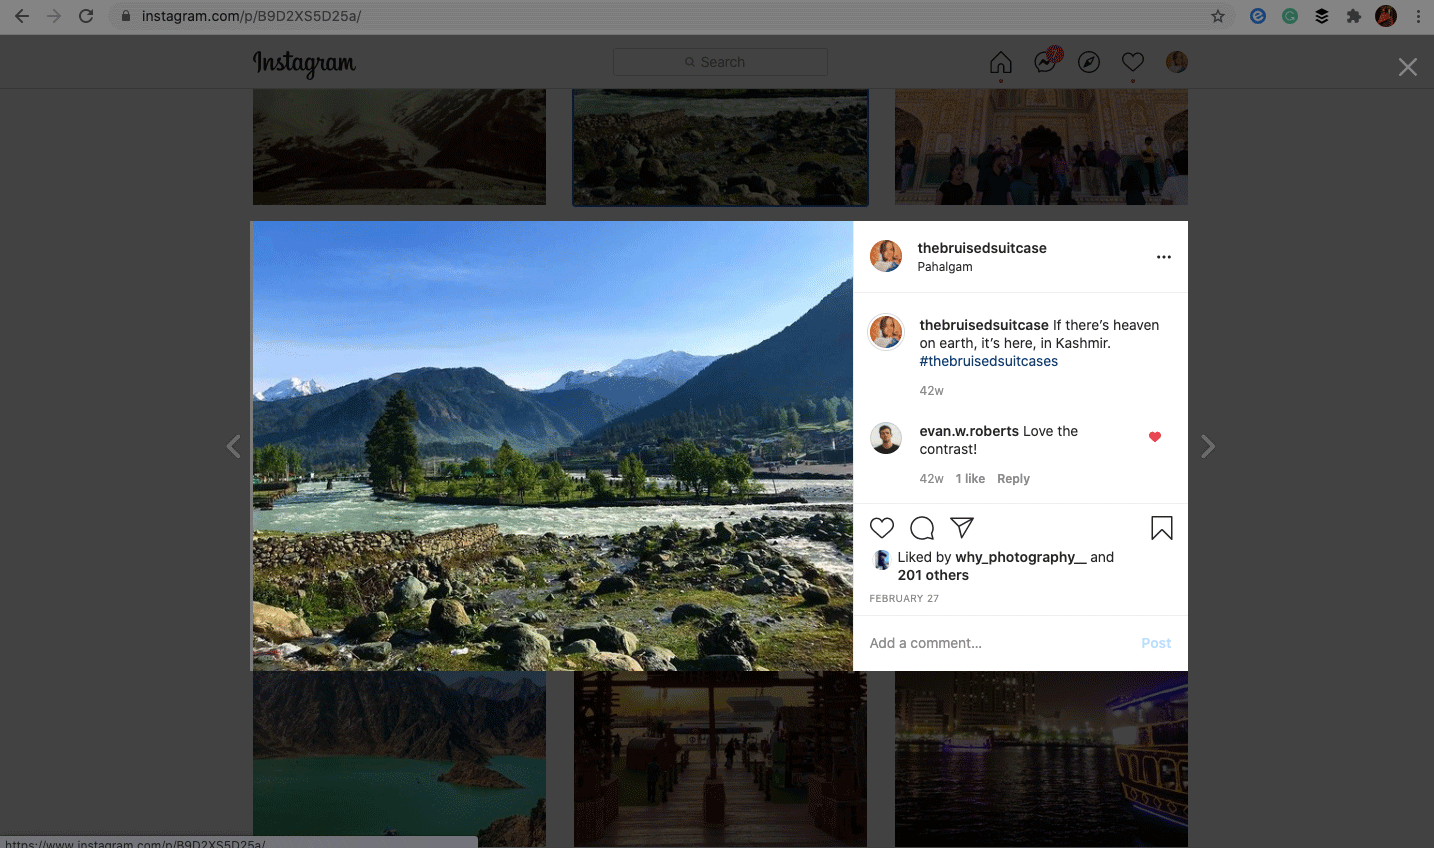
1. First thing first, log in to your Instagram accounton your browser and open the Instagram post that you want to add to your Instagram wall. Now, click on the blue elink icon in the bookmarks bar. (You can right-click and choose ‘save this page’ as well.)
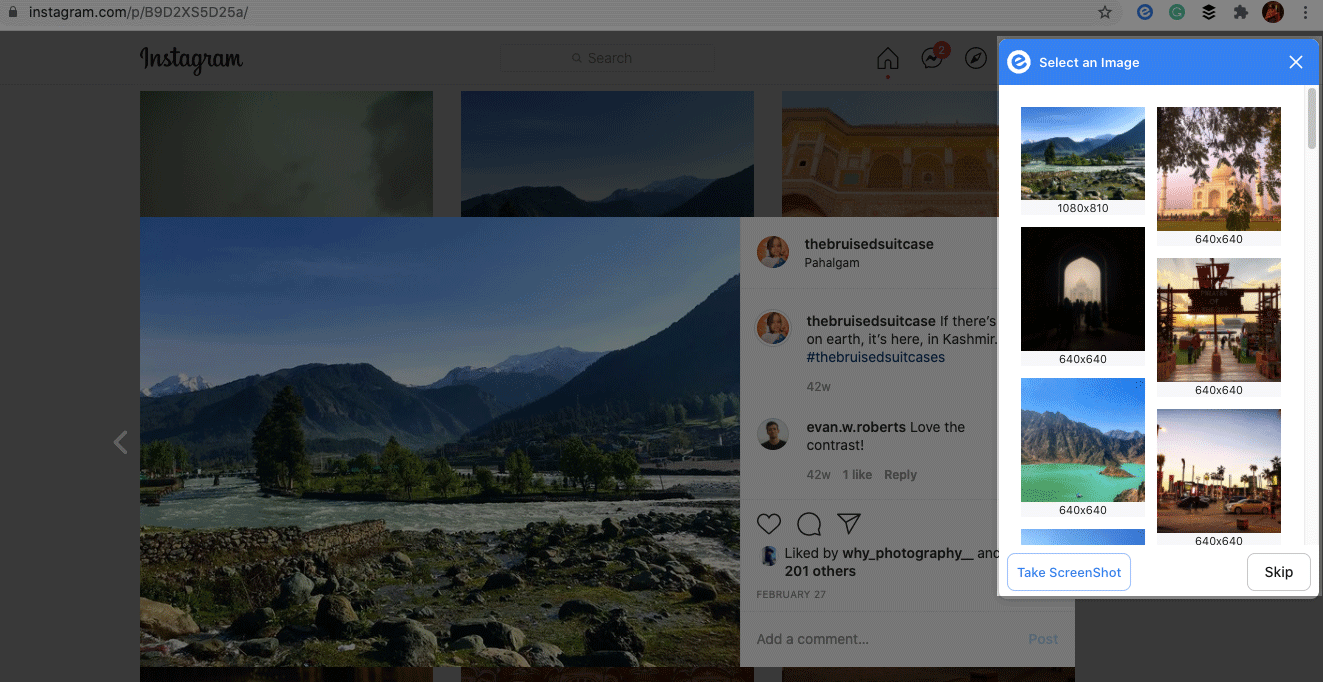
2. Once you click on the blue elink icon, you’ll get to choose an image that best represents your content. Yes, you’ll most probably choose the one that’s there in your Instagram post, but having other choices isn’t always a bad thing, right?
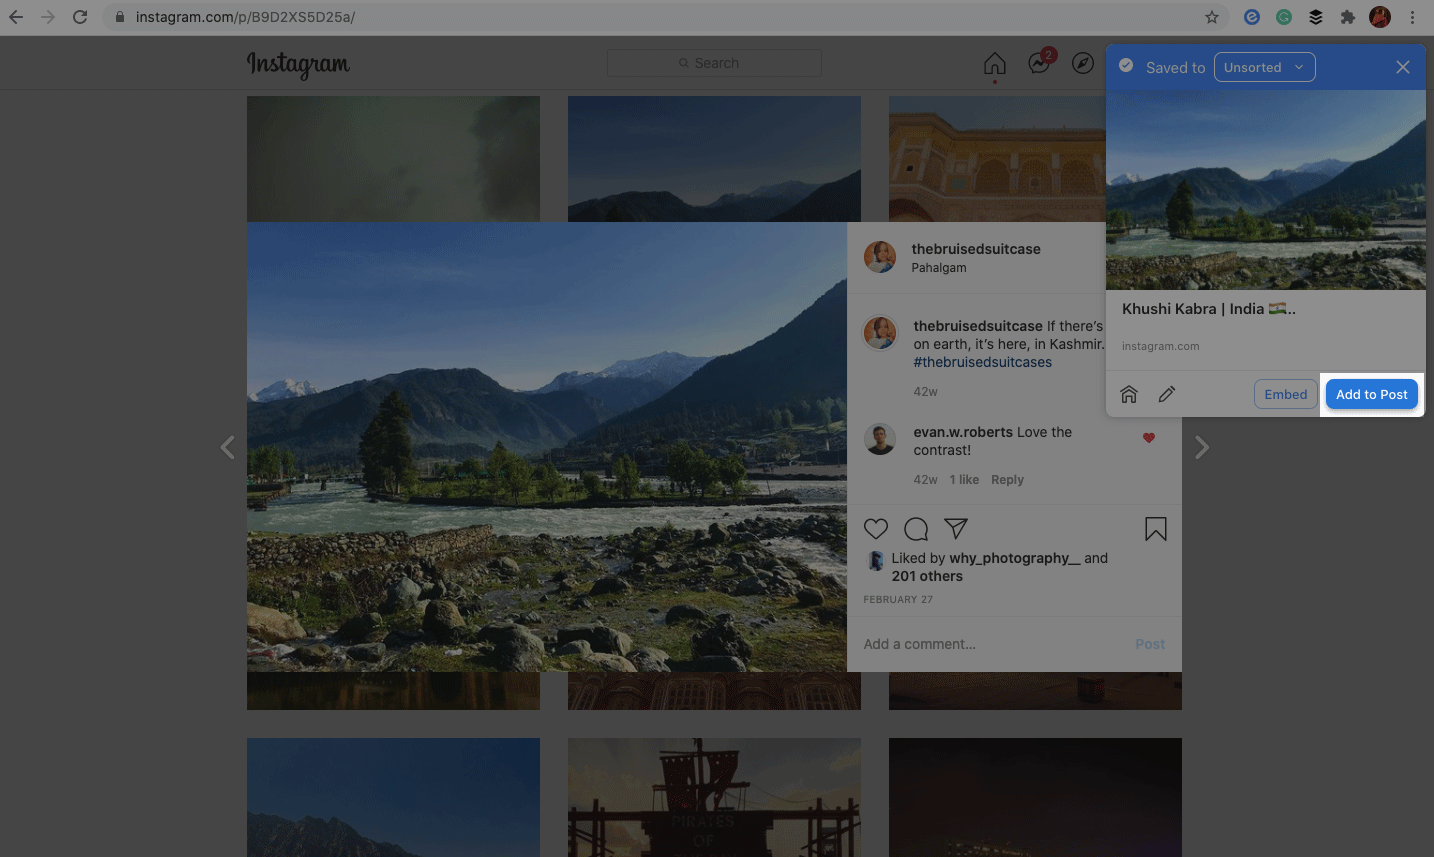
3. Alright, so now that you’ve selected an image, click on ‘add to post’. (Important: You can click on the pencil icon and edit the title & description of the Instagram post.)
4. When you’ll click on add to post, a popup will appear. Now, you can either pick an already-existing post or create a fresh one. Once that’s done, click on the “+’ icon to add that Instagram photo to the post you’ve just created.
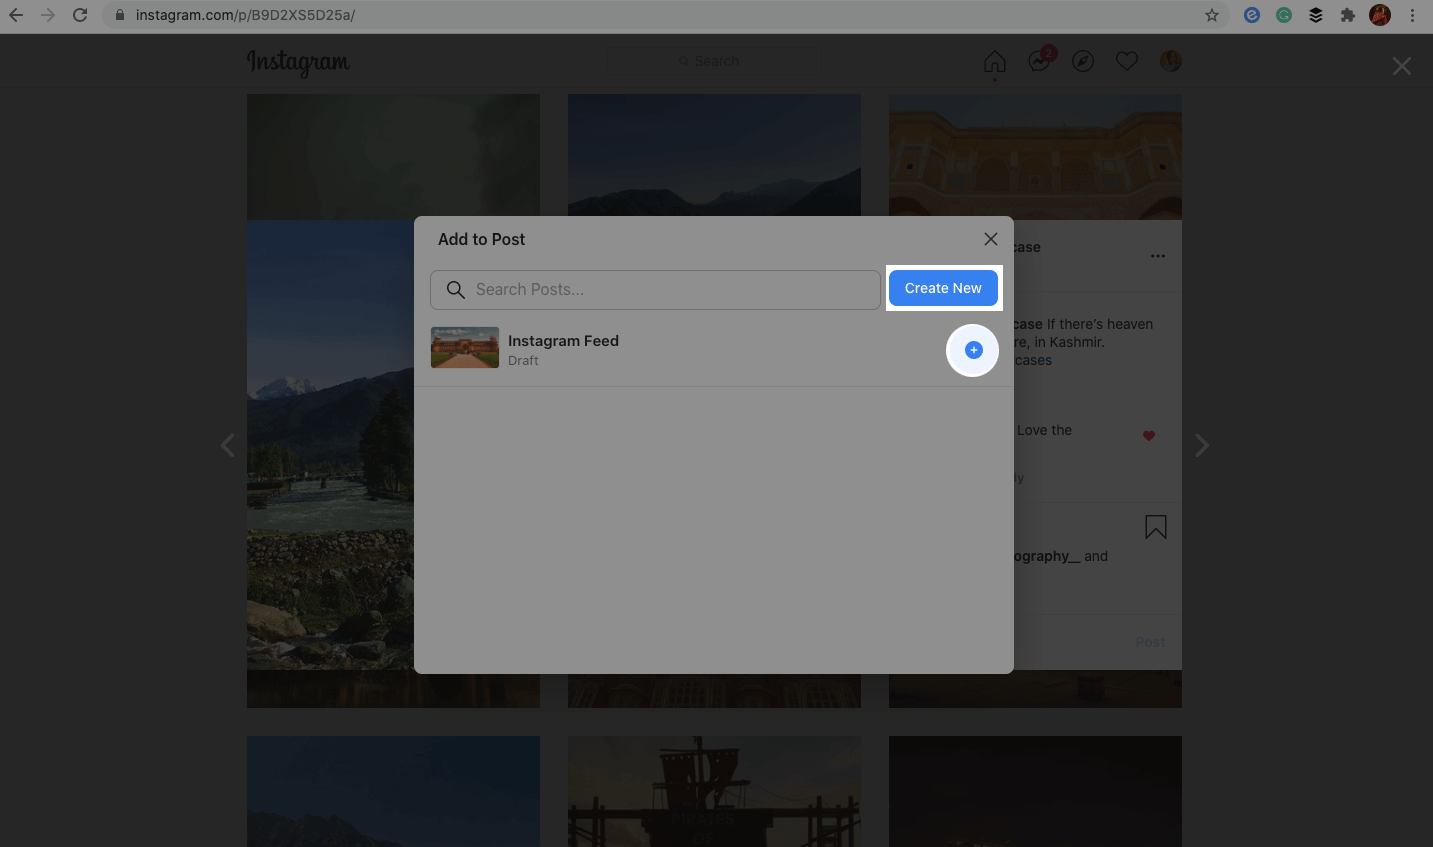
Keep repeating these steps for all the Instagram posts that you want to add to your Instagram wall. You don’t need to repeat the fourth step because once you’ve created a folder/post on elink, you can just click on the “+’ icon and your Instagram post links will be added to it automatically.
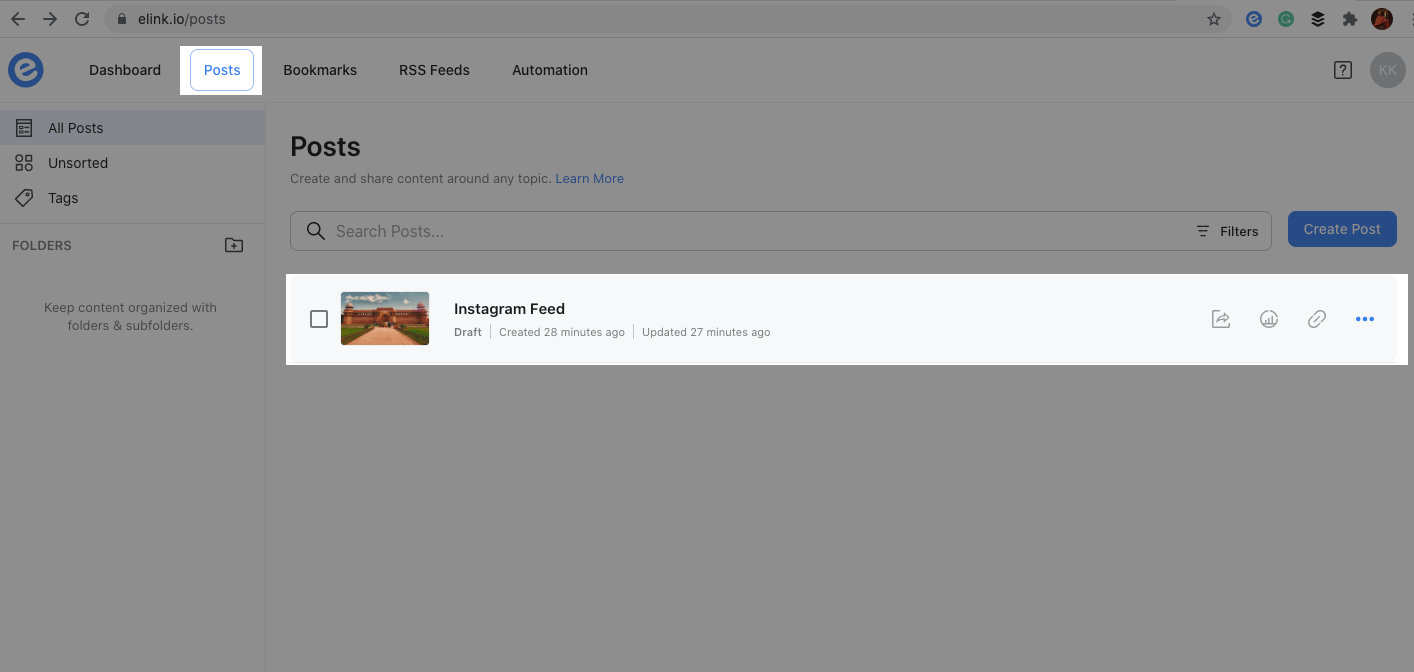
5. Here comes the most fun part. Head on to elink.io, click on the ‘posts’ section and open the post where you’ve added all the links of your Instagram posts.
6. Once you do that, you’ll enter the world of customization. elink lets you customize all aspects of your Instagram wall including the header image, theme color, layout, title, etc.
Your most important job though is to pick a layout. Here’s how you can do that: click on the ‘Layouts‘ tab, scroll down and choose a layout you love and want your Instagram wall to appear in.
With all the awesome layouts that are in store for you on elink, it might get a little difficult to pick the most appropriate one. But, don’t worry, because you can change the layout even after publishing and embedding the Instagram wall on your website! (elink, you’re awesome!)

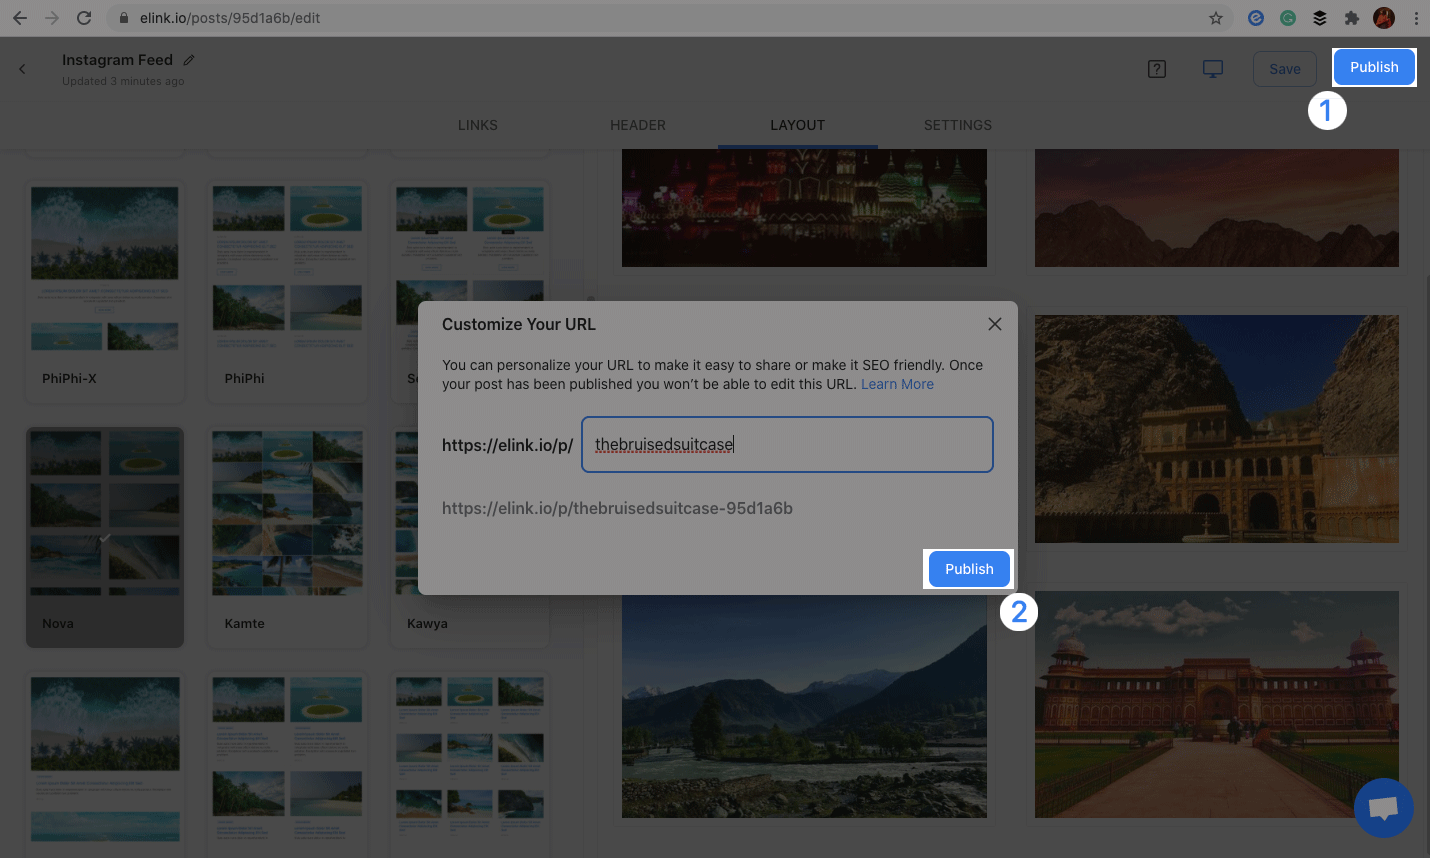
7. Once you’re fully satisfied and happy with the design, all you have to do now is publish it. Click the ‘Publish’ button on the far right corner of your screen. A pop-up will appear in which you can customize your website’s URL. After customizing the URL, hit publish again. Easy peasy lemon squeezy!
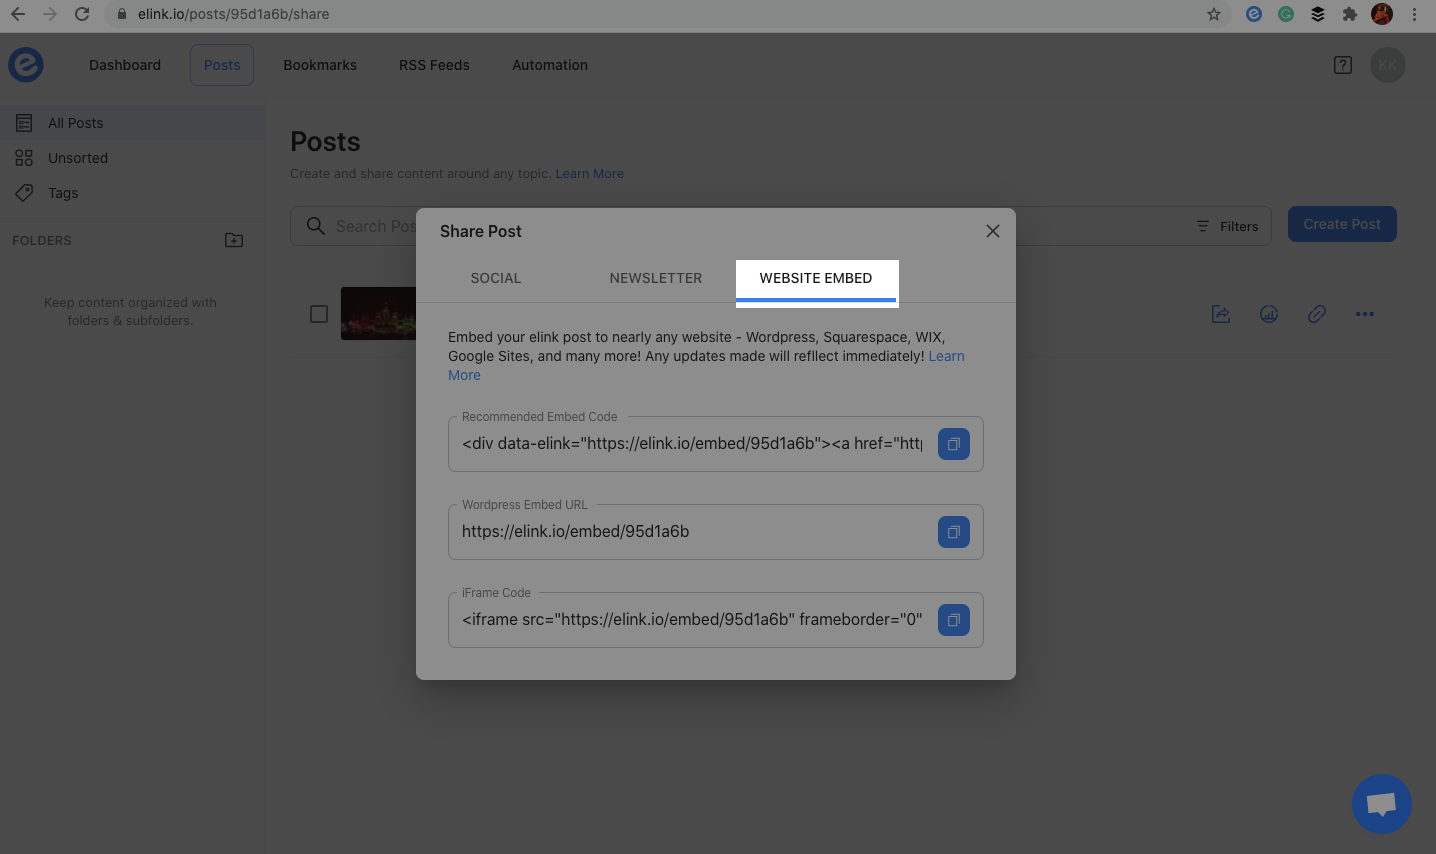
8. Now click on the Share button next to the post you published. You can embed this post on your Instagram wall on your website or blog by simply adding the Embed code. Click on ‘website embed‘, copy the code and then embed it on any website.
Important: Once you’ve created an Instagram wall for your website, you can update it in real-time! All you’ve to do is add the new links using elink’s browser extension, and they’ll show up on your website automatically. Why are you surprised? We told you elink is awesome. 😎
Wrapping Up
It isn’t unusual to see people with their heads down, scrolling through Instagram for hours.
So, with Instagram being such a BIG part of our lives, it’s no doubt that creating an Instagram wall for your website can make it much more credible, visually appealing, and boost your brand’s growth!
Because your website is the place where people come and get to know who you’re, and the stream of fresh pictures and videos will keep your website fresh, and your visitors hooked.
Yes, creating an Instagram wall for your website isn’t a “rule”, but this little tweak can make a huge difference!
By the way, if you’ve got any queries, just hit us up on Twitter @elink_io. We’d be happy to help you out!
Further reads:
10 Ways to Turn Your Instagram Followers into Customers
12 Instagram Trends You Must Not Miss!
How to Use the Instagram Bio Link Irrespective of Your Business Niche?
Instagram Bio for Business: Tips and Tricks
Grid Generator: What is it & How to Use it to Create Grid Layouts?
How to Embed an Instagram Feed to Your Website?
Instagram Bio Link Tools to Increase Followers!
Best Website Widgets That Can Drastically Improve Your Website
How to Embed an Instagram Feed to Your Website?